


Bringing Photos and Stories to Life
Photo Calendars

I still love looking at printed photos. But not in a pile in a box. When my son graduated from University, I shared wonderful photos of the event online (with lots of likes!). I was travelling to visit my aunt and uncle, who are in their 80s and don’t have a computer or mobile devices. My Aunt is an avid album keeper, so I printed the best photos to take to her. They were stunning. I showed them to the photographer who took them, and she was very moved to see how good her work looked – she doesn’t normally print. My Aunt was delighted, and every family member who dropped by wanted to see the photos. I doubt they would have been as enthusiastic to look at the 100 photos on my phone. This reinforced to me the value of sharing printed photos.
In the digital age, sharing our photos has become both easier and harder. We are taking more pictures than ever before. We can quickly share new photos on social media, hoping our loved ones see the post. We don’t have to drop off photos to be developed, get multiple copies made, and mail them to family. But with the convenience of instant sharing comes new problems. Social Media platforms reduce the size and resolution of our photos. If Grandma wants to print that great photo of her new grandbaby you shared on Facebook, she may find that the picture is grainy and blurry, because the resolution is poor. Online privacy is becoming more and more important. If you need to find a specific photo, the sheer volume of photos we take now makes this very overwhelming. And in this age of minimalism and de-cluttering, no one wants more stacks of printed photos.
The solution? Start a tradition of sharing your photos with Photo Calendars. Digital calendars are easy to create, reasonably priced, practical, and a gift that is always well received. I have been making calendars for family who live far away for many years – first paper ones with printed photos, and now digital calendars.
7 Easy steps to creating a Photo Calendar
Decide on the subject for your calendar – here are some suggestions:
Year in Review – pick 4 or 5 of your best photos per month. Tip: Use your photo organizing app to mark your best photos (only a few) each month, and you won’t have sort through a year’s worth of photos to make your calendar. This is easy to do with your photo app.
Family Highlights – choose a theme such as vacations, kid’s activities, hobbies, pets, and make a calendar that highlight these photos. Include a story about the month’s events. Tip: Use your photo organizing app to tag or create an album of the best theme photos each month.
Scenic Photos – if you are a hobby photographer and take great pictures, showcase your photos in a calendar. Tip: For dramatic effect, use only one photo per month. This also makes creating this calendar a snap!
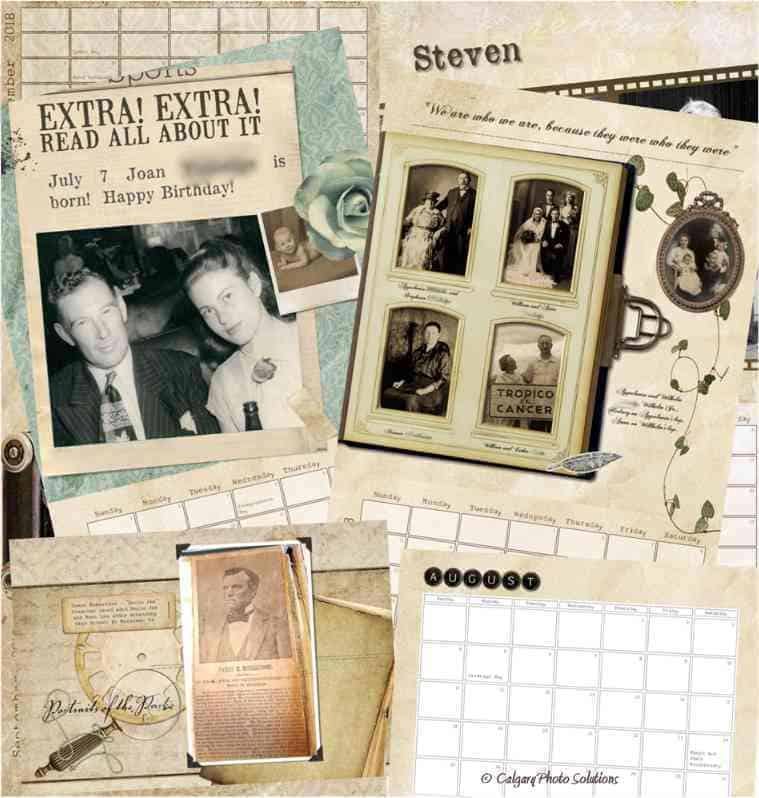
Vintage Calendar – bring your old family photos back to life by scanning them and putting the best in a calendar – this is a bit more work, but the calendars I have created with old photos have been treasured by the recipients. If you need help with scanning, Forever® offers media conversion service. The possibilities are endless, but here are some ideas for calendars I have created from scanned old photos: A Veteran’s Military Service, Family Ancestors, Holiday Celebrations through the years, family vacations or trips to the cottage, school photos through the years. I recently created a calendar for my Mother-in-Law with photos of her grandchildren (all adults now) from birth to their first birthdays. She was delighted to see these photos that she hadn’t seen for 20 years (I scanned them from her boxes of printed photos). And next year, I can carry on that theme.
Choose an online or software program to create your Calendar. I use Artisan® by Forever®. Forever also offers an online Create and Print service, with lots of calendar options to speed up the process. Tip: Take advantage of pre-designed calendar templates for fast and easy design. I have used heritage templates and created calendars that look like old drug store photos or newspapers.
Select your Photos. Tip: If the program you are using doesn’t allow editing, edit your photos before you place them in your calendar.
Add Photos to your chosen layout. Tip: Choose the number of photos per month based on the size of the calendar. Control the temptation to add too many photos to each month. Don’t reduce the size of photos to get more on the page. The most visually pleasing calendar will have 1 to 4 photos each month.
Include stories on your calendars – whatever information you can find or remember about the photos will enrich the photos and make the calendars even more of a treasured gift – particularly if using old photos. Tip: If making a calendar of family ancestors, include a family tree for reference.
Customize your calendar by adding holidays, events and family birthdays, if your software allows this. Some programs will let you add pictures to specific days on the calendar.
Upload and order your calendar. Tip: Use the preview mode of your software to see what the finished project looks like. Make any corrections necessary.
One of the best parts about making digital calendars is you can create one and order multiple copies for family and friends. And make sure you get one for yourself! What type of calendar will you create?

QR codes are a fantastic idea! Great way to share longer stories, family trees, and audio or video stories.
Anything, everything to bring families together. 🧐 This Christmas I may add QR codes to pages on our shared archive or Substack where I’ve tucked the stories.